Saturday, April 30, 2011

SSS & PTI Challenges Entry: Sympathy Card

Unfortunately, it's inevitable that we're going to need a sympathy card at some point.  Since many of these moments come unexpectedly, I like to have a stash of them made up.  One of the biggest problems I've had with sympathy cards is finding sentiments that don't sound cheesy or overly gushy.  Well, my problem was solved when I purchased Papertrey Ink's "With Sympathy" stamp set.  It has six lovely sayings to choose from along with other images.

This particular sympathy card is an entry in two blog land challenges:  Simon Says Stamp "Show Some Buttons" and Papertrey Ink's "Make It Monday #12:  Line Frame 101"

The Details:
  • I had purchased some pearl floral stamen a while back and hadn't used them for anything yet (yeah, well actually that's true of 80% of this squirrel's stash!).  I re-discovered them when digging for flowers and wanted to work them into my challenge card somehow.  Then it occurred to me to make the button the flower's center and have the stamen "grow" out of the buttonholes!  I love the effect...and you can adjust the length of your stamen.  The bonus is they will crush down rather easily for mailing and bounce back for the recipient.
  • So I had my flower center, but it was too white for the rest of my design.  Alcohol ink to the rescue!  Oregano alcohol ink was just the ticket to make these buttons and stamen the right color (and my fingers the wrong color...Alcohol Blending Solution and soap to the rescue!).

  • The other lovely details are the PTI leaf ribbon "branch" that the bird is poised on and Glossy Accents on said bird (which is also layered using cardboard and foam tape...I know, I know, I'm on a layering kick lately!)
  • The required elements are one PTI product (I feature four), the hand drawn line frame, and the buttons.

Supplies:
Paper:  Papertrey Ink ‘Kraft’ card stock; scrap pattern paper
Stamps:  PTI ‘With Sympathy'; Chatter Box ‘Fabulous’
Inks:  StazOn ‘Timber Brown’; Distress Inks ‘Vintage Photo’, ‘Tattered Rose’, ‘Crushed Olive’, ‘Wild Honey’, ‘Barn Door’; Alcohol Ink ‘Oregano’; Alcohol Blending Solution; Le Pen ‘Brown’
Embellishments:  PTI Leaf Ribbon; PTI Rustic Button Twine ‘Cream’; Darice Paper Petals; pearl stamen; mother-of-pearl buttons; Glossy Accents
Tools:  Tim Holtz Paper Distresser; ruler
Misc:  adhesive; foam tape, cardboard, glue dots


The Squirrel's Little Helpers:
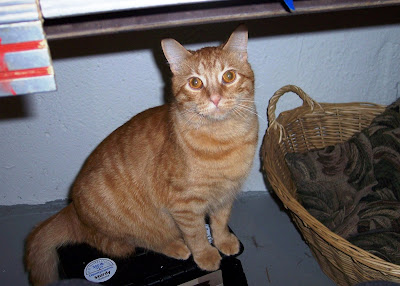
I had "help" in the studio today...  
I wish I could get a good photo of these two next to each other to show you the size difference.  They remind me of that movie "Twins" with Danny Devito and Arnold Schwarzenegger!

Mr. Dodger (Devito) just turned 1 year old this week!  (He's a stray/rescue so I'm not exactly sure of his birthday, but it's close.)  He is an absolute lover and likes to sit on the footstool under my work table and bat at me when he wants attention or wants to play with whatever I'm working with at the moment (which is often).  He's a chewer, so I have to keep my eye on him around cords, ribbon, fringe of any kind, scarves, receipts hanging out of my purse...
Oliver (Schwarzenegger) will be 12 in July and loves to visit me in the studio because he knows that's where momma keeps the treats.  And he'll always get some love if he comes to see me there.  He must have been feeling his age today because he wouldn't stay on the chair (out of Dodger's reach) until I added the pillow.  I guess I'll start calling him Prince Ollie!  His beautiful green eyes are just slits because he also has learned that a camera flashes.

Friday, April 29, 2011

Free Digi Friday: Royal Crown

I am AMAZED at the incredible response to the Free Rose Digi I posted on Tuesday!  Thank you all for your kind comments and special thanks to those who now follow me!  To celebrate, I'm instituting "Free Digi Friday". 

Today's freebie is "Royal Crown" in honor of today's royal wedding.  Don't they make such a lovely couple?

I whipped up a really quick card fit for a little princess...
 
The Details:
  • After coloring the crown with markers, I "bedazzled" it with various pink rhinestones and 'Fruit Punch' stickles.
  • The pink oval was embossed with TH swirls texture fade
  • The "PRINCESS" is also embellished with 'Fruit Punch' stickles
Like I said this one was quick!  Click on the image to download the free "Royal Crown" digi:

**EDITED**

Friday Free Digis are free for one week.  This digital stamp is now available for purchase.  To order, go to the side bar, enter the stamp name shown below and click 'buy now' to pay via Pay Pal.

Cost:  $2.00
Stamp Name: Royal Crown

I will email you the file once payment is received.


Supplies:
Paper:  DCWV; SU! Card stock ‘Ultrasmooth White’, ‘Rose Red’
Stamps:  Crown Digi; My Mind’s Eye ‘Perfect’
Inks:  Martha Stewart craft markers; Distress Ink ‘Tattered Rose’; SU! Classic ‘Rose Red’; SU! Stampin’ Write marker ‘Rose Red’; Zig metallic marker ‘Gold’
Embellishments:  rhinestones; Stickles ‘Fruit Punch’
Tools:  Tim Holtz Paper Distresser; Coluzzle; TH swirls texture fade; Texture Boutique
Misc:  foam tape

Thursday, April 28, 2011

Challenge Entry: Red & Gold

I LOVE being on staycation...I've got a nice clean house and now I can just create my little heart out! And I have time to answer some of the wonderful challenges out there in blog land.  Today, I tackled Gingersnap Creations Color Challenge: GC100 Red & Gold and had a BLAST!  I see many more challenges in my future...


A good friend IS cheaper than therapy, and it will have to be a GREAT friend who receives this card!  ;-)  This baby is detailed and I love every inch of it! 
 
A Few of the (many) Details:
  • The French girl is stamped on red damask pattern paper, then stamped again on SU! Blush Blossom cardstock.  The BB image was adhered to scrap cardboard and cut out so I could color her and she wouldn't have red skin.  I'm loving this layering technique lately.
 
  • The top of her dress was accented with furry fibers and Xmas Red Stickles.
  • Her hair was accented with Gold Stickles.  Gold Stickles dots were also placed randomly along the gold cord in the background
  • The champagne glass was covered in Glossy Accents so that it would look like real glass.
This card was just so much fun...I hope the Gingers like it and you like it too!

Supplies:
Paper:  Stampin' Up! 'So Saffron', 'Blush Blossom', & 'Ruby Red' cardstock; DCWV
Stamps:  All Night Media; 7 Gypsies 'Friends'; SU! 'French Script'; Scrappy Cat
Inks:  StazOn 'Jet Black'; Encore Ultimate Metallic 'Gold'; SU! Classic 'So Saffron'; Distress Ink 'Barn Door', 'Wild Honey', 'Old Paper'; Martha Stewart Craft Markers, Zig metallic marker 'Gold'
Embellishments:  Stickles 'Gold', 'Xmas Red'; SU! gold cord; ribbon; fibers; Recollections amber jewel; Tim Holtz Memo Pin; Glossy Accents
Tools:  Tim Holtz Paper Distresser; 3M Super 77 spary adhesive
Misc:  cardboard

Wednesday, April 27, 2011

For My Mom - Layering Technique

My mom loves to sew and is an incredible quilter.  She made many of our clothes when we were kids...until she went back to work when I started school.  When I saw the "girl with pattern and dress form" image on Graphics Fairy, I knew it was perfect for my mom.  Then, while touring Hobby Lobby yesterday, I found this lovely ruler twill tape (on sale!)...it was all coming together!
The Details:
In addition to the sewing image and new twill tape, I was also inspired to try my hand at a technique highlighted by Julie over at A Vintage Chic.  The layering she did was so detailed, but I decided I'd start with something pretty easy!

  • I used two images to create the layers, but depending on your image and how detailed you want to get, you could use several images.
  • The images are colored identically using SU! watercolor pencils and a water pen.
  • From left to right:  complete image (base), background arm/pattern, forground girl/arm/pattern
  • The first layer is the whole image.
  • Second layer is the background arm / pattern.  I glued the piece to a scrap of cardboard (from a cereal box...recycling!) and attached it to the base image.  I didn't want this image to be too defined from the base.
  • At this point, I distressed all the edges with Vintage Photo Distress Ink using a foam blending tool.
  • Third layer is the girl with foreground arm / pattern.  I glued this piece to a scrap of cardboard and attached it to the base image using foam tape.  The foam tape adds extra thickness and dimension to this layer. 
  • I distressed all the edges of the third layer with Vintage Photo DI. 
The card is finished off with a SU! hand-stitched background stamp in Tattered Rose DI, layers of ruffled crepe paper and K&Co. floral pattern paper, the ruler twill tape (of course!), button, ribbon, and Papertrey Ink baker's twine.

Tuesday, April 26, 2011

Free Rose Digi

Mother's Day is less than two weeks away!  And what does every mother like getting for Mother's Day?  Flowers of course!  In honor of all the moms out there, I'm offering this free rose digital stamp.
The Details:
  • I printed the rose digi on vellum, then colored the image on the reverse side using Martha Stewart craft markers.  The markers are blendable, so you can create a watercolor effect.
  • I printed the rose onto white paper, cut out just the roses and used vellum tape to adhere it to the back of the colored vellum image.  This makes just the roses opaque and really pops them off the background.
  • Then tore all around the image and distressed the edges with Vintage Photo Distress Ink
  • The card base is Dark Chocolate from Papertrey Ink.  I've just recently discovered their cardstock and love it!  I will only use PTI or Stampin' Up! stock for my card bases; nothing else I've found is heavy enough.  You can barely see it in the photo, but the cardstock also has a stitched background stamp from SU! in Timber Brown StazOn.
  • I embossed the burlap decorative paper with the Tim Holtz Gridlock texture fade and used Vintage Photo DI and Tim's paper distresser to really make it look worn.  Then I added adhesive to the back and added it to the cardstock uneven and crumpled. 
  • Before adding the vellum rose image, I stamped "For You" on the tag in Timber Brown StazOn and added the PTI baker's twine which had been darkened with Vintage Photo.
  • And finally, on the front rose, I followed the lines with Glossy Accents.  As the GA dries, it will crinkle the vellum a little, making the roses have even more dimension.
Here's the free rose digi.  I did leave the tag blank so, it's actually a pretty versatile image.  Also good for birthday, thank you, sympathy, thinking of you, etc.  So have fun creating! 

**EDITED**
Friday Free Digis are free for one week.  This digital stamp is now available for purchase.  To order, go to the side bar, enter the stamp name shown below and click 'buy now' to pay via Pay Pal.

Cost:  $2.00
Stamp Name: Rose

I will email you the file once payment is received.

Monday, April 25, 2011

Another Spring Collage

Yesterday's spring collage was actually a birthday gift for my sister, Cindy's, ahem..."big" birthday this past February.  :-)

I loved working on the project so much and had such a hard time parting with the end result that I just had to make one for myself!  Many of the items that I used on the original collage were one of a kind to my stash, and since creating the first, I had added items to my collection, so this one is a bit different from the first.  I kept the robin's egg blue background though since that color just says ''Spring!" to me.
  • The bird border is from K&Co...so beautiful!
  • I stamped the birdcage with Vintage Photo Distress Ink and then covered the entire image (and a little beyond the edges) in Glossy Accents.  Once it was dry, I cut the image out, applied Old Paper Distress Ink to the edges, and added some Old Paper Distress Stickles to the face.

  • Since I wanted my butterfly to pop off the canvas and look like he's just resting for a moment, I used Grunge Paper as the base, colored it with various colors of Distress Ink, covered the whole thing in Old Paper Distress Stickles (shocking, I know!),  and added a little pink and gold glitter to the edges of the wings while the stickles were still wet for a little extra glitz.  The Grunge Paper is so durable that I was able to bend the wings up for a 3-D effect.
Linking back to "Brag Monday" at the Graphics Fairy.

I'm off work this week for a spring cleaning "vacation", and I will surely be hitting the studio hard in the evenings for the real fun.  So, be sure to check back every day this week...I'll be adding lots of new ideas and some free digis. 

But for now...I'm back to washing walls.  :-(

I told you Spring finally came to Michigan!
(Well at least by me anyway...the Creative Pointe is still a few weeks from seeing Spring...haha!)

Sunday, April 24, 2011

Happy Easter!

Spring has sprung, even here in Southeast Michigan.  It was iffy there for a while (snow last week), but my hyacinths and daffodils are blooming, there are buds on the tulips, and green things are poking through the earth.  To celebrate the season of renewel (and my sister's 50th birthday), I created this Spring collage using a variety of items from my stash.  That's right...this squirrel raided her precious stash!!  I loved this project, it really brought out my creativeness. 


I even worked some fabric scraps into the collage. 
Be sure to use an ink that is suitable for fabric application like Fabrico.
I cut the "Spring" using my Cricut and glittered it with pink glitter.  I added
a little gold glitter to the pink for an antique appearance.

I love how it looks like the little girl is finding her Easter egg under the
bouquet of flowers.
Collage tips: 
Gather your elements
  • Select a base.  I used a 8"x10" canvas that I painted robin's egg blue and speckled with dark brown.
  • Select a central image for your theme.  This gives you a guide as you select items for your collage.  If an element "fights" with your central image or theme, it's out.  In my Spring collage, the chicks image is the key. 
  • Grab a basket and sort through your supplies.  If you think something may work in the collage, toss it in the basket, don't worry about coordinating anything at this point.
  • Run the gamut...throw in ribbons, embellishments, stamps, inks, everything that may work in your desired scheme.
Once you have your basket of potentials, start a preliminary layout. 
  • Things look best in odd numbers.  Notice that I used 3 pink buttons at the bottom of my collage.  If you count the flowers, there are 5.
  • Don't split the focus.  Just as everything should highlight and compliment your key image in color, pattern, and theme, everything should pull the eye to this key image.  In my Spring collage, all the secondary elements overlap or touch the chicks picture.  This overlapping technique draws the eye to and from the key image and unifies the entire image.

So, what will you collage?  Come on, dig into those stashes and let's see what you come up with!

Saturday, April 23, 2011

Spring Babies

Springtime means babies...at least in the animal kingdom, right?  I'm hoping that the neighborhood feral cat (Dodger's momma) is not preggers again...but I think she is...

Spring is often the time for human babies as well.  I know several people who have either just given birth or just found out that they are having a baby. 

My friend Suzette and her husband welcomed daughter Alaina into the world last week.  I made this card for her baby shower.  Since I knew she was expecting a girl, I used a sweet confection color palette with a vintage flair.

Supplies:
Paper:  Stampin' Up! cardstock, scrap stripe pattern paper
Inks:  Vintage Photo Distress Ink
Images:  Vintage baby carriage image from K & Company Ephemera Pack Other:  Old Paper Distress Stickles, ribbon, Tim Holtz Trinket Pin, assorted glass beads, silver headpins, needlenose pliers, scallop decorative scissors, foam tape, adhesive

The Details:
  • I love how the glass beads on the trinket ring add that little something special and unexpected to this card.  Since I was hand-delivering this card, I could really go all out with the embellishments.
  • The other "something special" is the touch of Old Paper Distress Stickles.  I LOVE Old Paper Distress Stickles!!!!  I am on my second bottle.  They are the perfect color to add that tarnished silver hue of true antique glitter to your projects.

Friday, April 22, 2011

Welcome to my blog & Happy Good Friday!

Well, I've been tossing around the idea of starting a blog...and now I have!  I'm so looking forward to sharing my creations with you.  My sister Cindy (http://creativepointe.blogspot.com) has been blogging her craftiness for about 5 months now and has finally convinced me that it's time for me to join the fun.  I'm a part-time crafter...darn that real-world job!...so this should be a good way to keep me on my creative toes. 

The first project I want to share with you is my Easter cards for this year.  These were an experiment in shabby chic / distressed a la Tim Holtz (but obviously girly-er). 
Supplies:
Paper:  Stampin' Up!, K&Co.
Inks:  Vintage Photo Distress Ink & Timber Brown StazOn
Stamps:  SU!
Images:  Girl with Easter egg image is a laser cut I received as a crop giveaway
Other:  Rock Candy Distress Paint, large silk flower, small paper flower, lace, ribbon, white photo corners, foam tape, scallop decorative scissors, splat mat, adhesive
  • I really wanted these cards to have a vintage feel.  I stamped the crackled paint background on cream cardstock with vintage photo, layered K&Co. papers that had an old wallpaper feel to them on top of that, and kept up the layering with the lace, ribbon, and flowers. 
  • The "wishing you..." sentiment is accented by white photo corners that were antiqued with vintage photo and is adhered using foam tape for dimension.
  • I covered the entire laser cut image with Rock Candy Distress Paint.  The distress paint will curl your paper.  After experimenting, I found that if I used a little tape to lightly adhere the laser cut to my Splat Mat, THEN covered the image in Rock Candy and let dry completely, I had a much better chance of my image turning out flat and intact.  If you're working with a detailed image such as this one, let it dry before trying to move it.  The distress paint makes the paper very delicate until it is dry.
  • After the Distress Paint was completely dry, I lightly distressed it with Vintage photo.  This really brought out the cracks and made the image look old.