Showing posts with label Tutorial. Show all posts

Saturday, February 4, 2012

CADB Super Bowl Blog Hop: Masculine Card, a Tutorial, & a Free Digi!

Whew, what a mouthful!

This weekend is SUPER regardless of whether you'll be watching the big game. In honor of this very Man-Oriented weekend, we designers at Card A Day Blog decided to do a Blog Hop with a Masculine Theme. Come on, we all need as much inspiration as possible for creating non-girly cards, right? Oh, and of course there are giveaways, so be sure to visit all the blogs (list at the end of this post)!  

Now, put your lace, ribbon, and flowery papers away! I'm going to give you a tutorial on how to make this very masculine (and very cool) metal gear panel I used on my brother's birthday card, but first let's talk about the card...


A Couple Details:
  • My brother is a painter by trade, so I loved this 7 Gypsies "News Flash" card (I know, the guy's hanging a poster, but he's got a brush in his hand, so it made me think painter). The vintage feeling, male image, and neutral colors keep us well within the manly realm.
  • When in doubt for masculine images to use, reference Tim Holtz!  While he can branch out into feminine, the king of distress keeps things pretty manly-to-gender-neutral.  This large TH clock image was stamped onto vellum with StazOn Jet Black.  The vellum started out white, but I colored the BACK side with distress stain to make it work with the other elements.
  • The clock button was also distressed to make its original bright finish more brassy and antique.  On this element, I used Alcohol Inks to adjust the color.


Okay, on to the star of this card...the embossed and distressed metal panel...

Metal Panel Tutorial:
Note:  The process to create this metal panel contains many techniques by Tim Holtz.  I give credit where credit is due, however I have not seen a project where he combines them in this way.
  • Start with a strip of aluminum duct tape from the heating and cooling department of your local home improvement store.  Adhere this to Ranger glossy cardstock and emboss with Tim Holt'z Retro Circles texture fade.  Tim himself recommends using glossy cardstock as a base when embossing metal tape and he's right...it really makes the embossing crisp.
  • Pounce on Alcohol Inks and Blending Solution to "tarnish" the metal.  I used Ginger, Mushroom, Caramel, and Copper Mixative colors.


  • Pounce entire strip with VersaMark ink pad, then apply clear embossing powder.  Hold the strip by the edges over a trash bin and flick the back hard with your finger.  This removes the excess embossing powder. I gave mine several good flicks because I wanted a random, bumpy texture.  Tim Holtz calls this the "Orange Peel" technique and it's a good description for the texture you'll get. 
  • Melt embossing powder with heat tool.  Make sure embossing is completely cool before continuing to the next step.
  • Pounce on brown acrylic paint, followed by black acrylic paint until desired coverage and color is achieved.  I used Americana Burnt Umber and Lamp Black.  Allow to dry completely before continuing to the next step.
 
  • Using a damp paper towel or baby wipe, rub the high areas lightly to remove some of the paint.  Continue until the desired effect is achieved.


  • Spray metal strip with Krylon Crystal Clear to lock paint in place and give it a beautiful shine.  Truly, don't skip this step, it makes overall effect and color so rich!
That's the tute!  Hope you get a chance to play with this combination of techniques, it sure was fun!!

Now, don't miss out on the other blogs in the hop.  Many are giving away prizes on their individual blogs PLUS there's a big prize on the Card A Day Blog.  Check out all the details below.

Oh, that reminds me, this weekend only, I've got another free Valentine digi for you.  I'm calling this one "Love Nest".  Get it while the gettin's good, because on Monday, it's GONE!  Happy Hopping!


**EDITED**
This digital stamp is now available for purchase. To order, go to the side bar, enter the stamp name shown below and click 'buy now' to pay via Pay Pal.
Cost: $2.00
Stamp Name: Love Nest
I will email you the file within 24 hours of receiving payment.

It's BLOG HOP TIME!
The designers at Card a Day Blog are joining together to do a blog hop this weekend! The theme is Masculine cards! Let's not let the guys have all the fun on Super Bowl Sunday....let's get a little of our own fun in!
To join in....visit all the participating designers by visiting their sites, some are having prize give aways...so make sure you pop in! Make sure you comment on all the blogs too, because at the end of the weekend, they are going to send a list of all who commented on their blog, and we are going to do a grand prize drawing of all comments on each blog! Blog Hop Prize
So JOIN IN TODAY....comment on the main blog page, and visit the other hop pages and comment there too!

Supplies:
Cardstock: Ranger Glossy cardstock
Pattern Paper: Cosmo Cricket ‘Circa 1934’; vellum
Stamps: Stampin’ Up! ‘It’s Your Birthday’; Tim Holtz ‘Life’s Possibilities’
Inks: VersaMark; Alcohol Ink ‘Ginger’, ‘Mushroom’, ‘Caramel’, ‘Copper Mixative’, ‘Blending Solution’; Americana acrylic paint ‘Lamp Black’, ‘Burnt Umber’; StazOn ‘Jet Black’; Distress Ink ‘Old Paper’; Distress Stain ‘Brushed Corduroy’
Embellishments: Aluminum tape; Tim Holtz texture fade ‘Retro Circles’; Zing embossing powder ‘Clear’; 7 Gypsies journaling card; JHB clock button

Tools: Sizzix Texture Boutique; Krylon ‘Crystal Clear’; heat tool; foam ink blending tool; deckle scissors; vellum tape; Wondertape; tweezers; TH paper distresser; Zot glue dots

Friday, December 23, 2011

Future Floor Polish Update

I've had some questions on the Future floor polish that I used on the Alcohol Ink Ornaments and wanted to give you an update. Apparently, I've had my bottle for quite some time because in 2007 this product was renamed...but never fear!...it's still available!

From SC Johnson Wax website:
The Future Floor Polish product - acrylic floor finish for no-wax & regular floors - was renamed under the Pledge® brand in November of 2007. It is now Pledge® Premium Floor Finish with Future® Shine. It is still the same great Future formula, just with a new name. It still provides that durable, long lasting shine.

Thought you'd want to know this if you've been looking for Future floor polish.

Laura also asked whether this technique can be used on the inside of plastic ornaments. I've never tried it myself, but can't image that it wouldn't work. If you know for sure, please let us know...thanks!

Friday, December 16, 2011

Tutorial: Alcohol Ink Ornaments

The Glittered Santa Ornaments inspired me to play around with some round clear glass bulbs that I’ve had in the stash for much too long.  I started out trying to replicate mercury glass and ended up with some really special, colorful, beautiful, glittery ornaments!  Truly, these were one big experiment, but once I got the technique down, they are super easy.

The Tutorial:
1.     Using a felt ink blending tool, pounce a blend of Silver Mixative, Mushroom, and Blending Solution Alcohol Inks onto a clean, clear glass bulb, covering the bulb completely.  The ratio is approximately 5 silver: 2 mushroom: 3 blending solution.
 
TIP:  Recognize this handy-dandy ornament stand?  
It's the little gizmo that keeps your pizza from sticking to the lid of the box!

2.     You can apply the colored alcohol inks either from the bottom or the top.  The tutorial photos show it applied from the bottom, but after experimenting, I actually prefer applying them from the top.  Remove the metal hanger cap to apply from the top. 

Select your color scheme for your ornament (1-3 colors) and starting with the lightest color, apply 1-3 drops at a time at intervals around the bottom center or top opening.  I say 1-3 drops because you want to apply enough ink so that it will run most of the way down the ornament, sometimes maybe all the way down the ornament.


3.     Let each color dry slightly before applying the next.  With each color, alter the application intervals, have fun, and experiment! 

4.     The silver base application will sort of “peel” off and blend with each color addition, don’t worry, this is part of the charm!

5.     If desired, add more silver on top of the colors and repeat the color applications again at half as many drops / intervals.

6.   Once you are satisfied with the color application, let dry overnight.
7.     Remove metal hanger cap and add approximately 1 tablespoon Future liquid floor polish to the inside of the bulb.  (Don’t worry about measuring, this isn’t an exact science, I just want to give you an idea of how much you’ll need.)  Swish the floor polish around until the entire inside is coated.  Drain excess.
Update!  From SC Johnson Wax website:
The Future Floor Polish product - acrylic floor finish for no-wax & regular floors - was renamed under the Pledge® brand in November of 2007. It is now Pledge® Premium Floor Finish with Future® Shine. It is still the same great Future formula, just with a new name. It still provides that durable, long lasting shine. 
Thought you'd want to know this if you're looking for Future floor polish!  Apparently, I've had my bottle for quite some time!
8.     Add silver glitter to the inside of the bulb.  Plug the opening with your finger and shake gently.  Keep adding glitter until the inside of the bulb has good, even coverage in glitter.  The glitter acts as a mirror and brings your AI colors to life!


Here’s a couple more ideas to inspire you to play:
·         Use painters’ tape to mask off certain areas and create patterns:

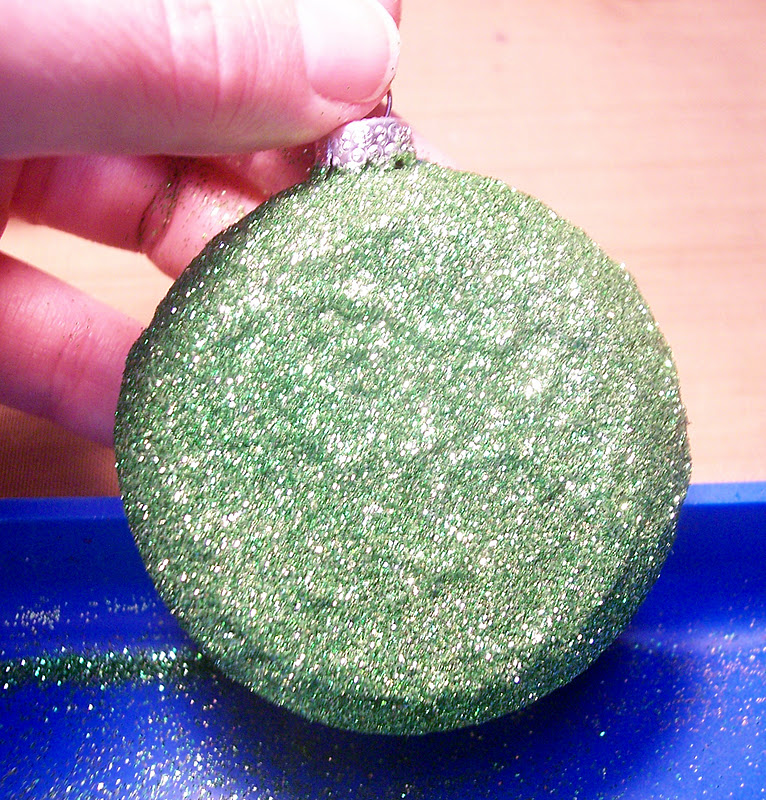
·         Sprinkle glitter on the outside of the bulb too.  Just add it while the AI is still wet and the glitter will pick up some of the AI color and stick really well.

Here are three of my finished ornaments.  The colors on the left ornament were applied from the bottom, the colors on middle and right ornaments were applied from the top.

This one’s my FAVORITE!!
The color scheme on this one is Red Pepper, Oregano, and Aqua.


It will be hard to give away, but I will, because I know it’s going to a good home.  J

It’s so hard to photograph glass and glitter well!  These are ten times prettier in real life!
I had a blast playing with color schemes and altering how I applied the color layers.  In fact, the only thing that stopped me was that I ran out of bulbs!  I think I’ll be hitting the after Christmas sales to stock up on some more for next year.

Like I said, these go really quick and are super fun to make (addicting, actually).  So if you still have some co-workers, teachers, or other folks on your shopping list, you can whip up a bunch of these beauties with just a pinch of time and moo-lah.


Don't forget to enter the  
Santa's Naughty Helper Challenge!  
It's easy and there's a PRIZE!
Click HERE for all the details.

Monday, December 12, 2011

Glittered Santa Ornaments

Every year, I make ornaments for my niece and nephews as part of their Christmas gift.   I usually paint porcelain ornaments, but this year I really wanted to create papercrafted ones.  About a month ago, I found these really unique clear glass bulbs.  Their flat front and back are perfect for papercrafting!

The Details:
·         Starting with this fantastic Santa image from The Graphics Fairy, I printed the quantity needed onto plain white copy paper and fussy cut.  Tip:  since I’m going to use glue on the face of the image, I gave the Santas a coat of Krylon Workable Fixatif to prevent the ink from bleeding.
·         I inked the edges of the Santa image with Old Paper Distress Ink and glued them to 2” circles of patterned paper.  I used Glossy Accents as the adhesive in this step because I knew that it would not cause the Santa image to wrinkle.
·         I added an even coat of glue to the FACE of the Santa circle.  Glossy Accents or Alene’s Tacky Glue both work equally well here, the key is just to make sure there is good coverage.  Pressing the Santa circle firmly from the center out works well to ensure good adhesion to the glass ornament.
·         Using painters’ tape to mask off the back half of the ornament made the next step a breeze! 


·         After the tape was in place, I pounced on a THICK coat of Alene’s Tacky Glue and then covered it in glitter, shaking off the excess and reapplying as needed to get full coverage. 


 ·         Remove the painters’ tape while the glue is still wet.


·         Once the glittered side was completely dry (overnight), I added rick rack along the glitter line.

·         First pouncing on some Old Paper DI, I then hand wrote “Naughty” and “Nice” on two white cardstock tags, joined them on a jump ring and then bound them to the top of the ornament with red and white baker’s twine that I then tied into a bow.

·         To keep as much glitter in place as possible, I sprayed on 2-3 coats of Krylon Crystal Clear to the back side.

These flat glass ornaments have endless possibilities!  I really wish I had purchased more, but I’m always hesitant to add too much to the stash without really knowing what I’m going to do with something.  I’m sure you all know how that goes!  They are manufactured by http://www.sierrapacificcrafts.org/, they have a store locator if you'd like to find them near you.

For another project using these great ornaments, check out The Creative Pointe, Cindy has some really neat ideas for these little beauties, too.

Also, don't forget about the  
Santa's Naughty Helper Challenge!  
Click HERE for all the details.


Linking back to Brag Monday at The Graphics Fairy!

Sunday, May 8, 2011

Tutorial: Crepe Paper Carnation

HAPPY MOTHER'S DAY! 
I am so blessed to have spent the day with my mom and most of my family. 
God bless all the mothers!
--//--

As I was working on the Mother Peat Pot, I noticed that the crepe paper ruffle looked a lot like the petals of a carnation.  So, inspired, I set out to make a crepe paper carnation flower and you can too, in eight easy steps:
1.  Cut two 6" strips of crepe paper.
2.  Layer the two strips with the top layer approx. 1/8" offset down from the top of the bottom strip.
3.  Fold the bottom edges up to be approx. 1/8" offset down from the edge of the top layer.  It should
     end up looking like this:
 
4.  Using polyester / cotton blend thread (for strength), and starting approx. 1/8" from the bottom
     fold, run a basting stitch along the entire length.  Be sure you're capturing all layers with your
     stitch. 

 5.  Pull the basting stitch together tightly, forming the layers into a ring.  IMPORTANT: make sure that
      the shortest layers are to the inside of the ring, these are your flower's center.  Knot thread.

 6.  Starting with the shortest layer (the center), gently separate the layers, pulling each layer up and
      toward the center.

 7.  Once all the layers are separated and the flower is formed, tap the edges with Distress Ink
      (I used Barn Door DI on pink crepe paper).
 8.  Spray entire flower with watered down walnut ink.  While the crepe is still wet, lightly tap
      the edges to ruffle the edges even more and to form the flower shape you want.  This step
      also bleeds the DI further up into the petals.  Allow to dry.

 Your finished crepe paper carnation flower...easy peasy!

Tip:  Use a stylus to aid in gluing your finished carnation to your project.  Apply a glue dot or two to the back of your carnation and gently press between the petals with the stylus to avoid crushing.

Be sure to stop by again tomorrow for a project featuring this lovely carnation!

Supplies:
Paper:  crepe paper streamer
Inks:  Distress Ink ‘Barn Door’
Tools:  sewing needle; polyester / cotton blend sewing thread