

The Details:
·
Starting with this fantastic Santa image from The Graphics
Fairy, I printed the quantity needed onto plain white copy paper and
fussy cut. Tip: since I’m going to use glue on the face of
the image, I gave the Santas a coat of Krylon Workable Fixatif to prevent the
ink from bleeding.
·
I inked the edges of the Santa image with Old
Paper Distress Ink and glued them to 2” circles of patterned paper. I used Glossy Accents as the adhesive in this
step because I knew that it would not cause the Santa image to wrinkle.
·
I added an even coat of glue to the FACE of the
Santa circle. Glossy Accents or Alene’s
Tacky Glue both work equally well here, the key is just to make sure there is
good coverage. Pressing the Santa circle
firmly from the center out works well to ensure good adhesion to the glass
ornament.
·
Using painters’ tape to mask off the back half
of the ornament made the next step a breeze!


·
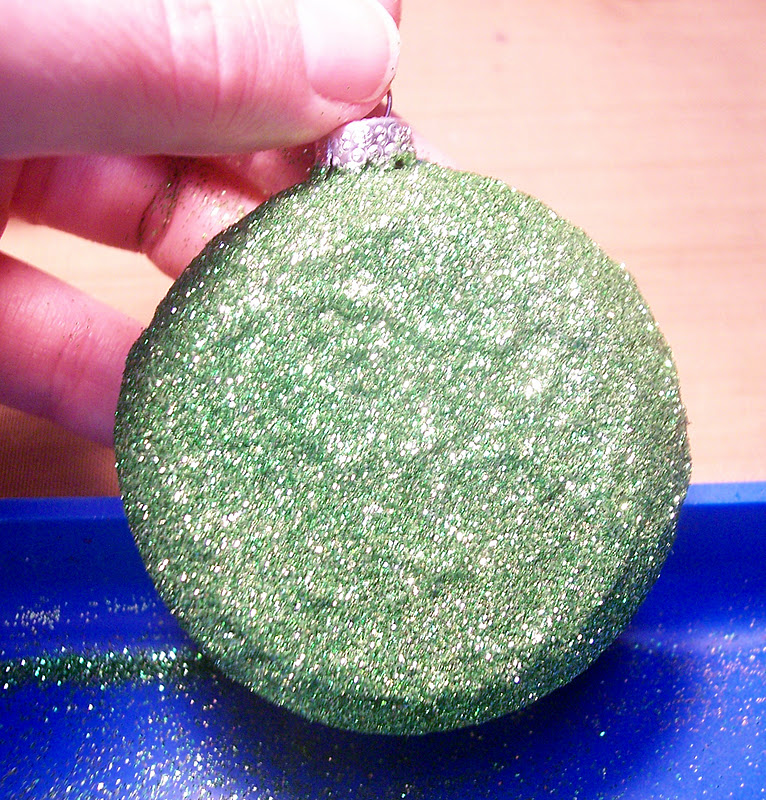
After the tape was in place, I pounced on a
THICK coat of Alene’s Tacky Glue and then covered it in glitter, shaking off
the excess and reapplying as needed to get full coverage.


·
Once the glittered side was completely dry
(overnight), I added rick rack along the glitter line.

·
First pouncing on some Old Paper DI, I then hand
wrote “Naughty” and “Nice” on two white cardstock tags, joined them on a jump
ring and then bound them to the top of the ornament with red and white baker’s
twine that I then tied into a bow.

·
To keep as much glitter in place as possible, I
sprayed on 2-3 coats of Krylon Crystal Clear to the back side.
These flat glass ornaments have endless
possibilities! I really wish I had purchased
more, but I’m always hesitant to add too much to the stash without really
knowing what I’m going to do with something.
I’m sure you all know how that goes! They are manufactured by http://www.sierrapacificcrafts.org/, they have a store locator if you'd like to find them near you.
For another project using these great ornaments, check out
The Creative Pointe, Cindy has some really neat ideas for these little
beauties, too.
Also, don't forget about the
Santa's Naughty Helper Challenge!
Click HERE for all the details.
Linking back to Brag Monday at The Graphics Fairy!
Very cute, and I like the Santa image you chose too :D
ReplyDeleteVisiting from BRAG MONDAY at Graphicsfairy :D
From Chilly NW Illinois,
Suzanne at WhyCuzICan
Very cool technique! Love the vintage look and will have to give it a try myself. Thanks for the step-by-step!
ReplyDelete