Sunday, December 25, 2011

Merry Christmas!

The Santa Cats say, 
"Merry Christmas to all and to all a good night!"
Santa Ollie - 2006
Yeah, he wasn't too happy with me...
Santa Dodger - 2010
The much more tolerant kitty!

Wishing you and yours a wonderful Christmas 
holiday season and peace in the New Year.

I’m taking some vacation time over the holidays, so I will be back in January!

Saturday, December 24, 2011

Merry Ornaments

T’was the night before Christmas and all through the craft room, a Cricut was stirring…

I created this last card for our entire department to sign and give to our boss along with her group gift.  It’s approximately 5x7, larger than my standard card size so that 20+ people could share their Christmas greetings on the inside.


Some Details:
·         I made my own background using Tim Holtz’s "Holiday Print" texture fade and highlighting it with Distress Inks.  Since texture fades are designed more for 4-1/4 x 5-1/2” cards, I added strips of patterned paper at the top and bottom to help fill the space.  I scalloped the edges and punched some “eyelet” using a small hole punch.
·         The ornaments were cut on my Cricut using Sure-Cuts-A-Lot and The Creative Pointe’s “Joy Ornament” SVG file.  The big ornament is approx. 3” tall.  To give it some extra dimension, I cut three layers…one from red patterned paper and two from red cardstock.  I stacked and glued these together, then add the green cardstock with “merry & bright” to the back.  

·      The large ornament was covered in a layer of Rock Candy Distress Stickles for some sparkle.  It also has an outline of Fired Brick D.S. around the oval cut out, Old Paper D.S. on the ornament cap, and the red area was covered in Glossy Accents after the Rock Candy D.S. had dried.

·         The smaller ornaments are the same ornament outline, but I removed the inner oval cut and scaled the SVG (scalable vector graphic) file to make one long skinny ornament and one short fat ornament.  These are cut from scraps, covered in Rock Candy D.S. and “hang” from gold cord.

Challenges:

Friday, December 23, 2011

Future Floor Polish Update

I've had some questions on the Future floor polish that I used on the Alcohol Ink Ornaments and wanted to give you an update. Apparently, I've had my bottle for quite some time because in 2007 this product was renamed...but never fear!...it's still available!

From SC Johnson Wax website:
The Future Floor Polish product - acrylic floor finish for no-wax & regular floors - was renamed under the Pledge® brand in November of 2007. It is now Pledge® Premium Floor Finish with Future® Shine. It is still the same great Future formula, just with a new name. It still provides that durable, long lasting shine.

Thought you'd want to know this if you've been looking for Future floor polish.

Laura also asked whether this technique can be used on the inside of plastic ornaments. I've never tried it myself, but can't image that it wouldn't work. If you know for sure, please let us know...thanks!

Thursday, December 22, 2011

Joy Banner

I keep seeing gorgeous holiday banners out in blog-land and thought I’d take a stab at one of my own.  Papertrey Ink coasters make a great base…lightweight, yet sturdy; easy to glue, ink, and punch.  Since this was my first go, I chose “Joy”, a perfect word for the season, yet only three letters.

A Few Details:
·         The Christmas patterned paper on each coaster is from Basic Grey, the rosettes were made from scraps in colors inspired by the background paper.

·         I’m really loving the glitter ribbon I found at JoAnn Etc at the beginning of the season.  It’s easy to adhere and doesn’t fray.  I used every color I purchased on this banner, alternating colors of letters, rosettes, and ribbon on each coaster.

·         The letters were cut using my Cricut and Sure-Cuts-A-Lot cutting program, inked, and glittered.
·         At the bottom of each coaster, I added a jump ring and tied on a jingle bell with red and white baker’s twine from Papertrey Ink.

·         Jump rings and baker’s twine also link the coaster panels together with chipboard asterisks separating the letters.
·         I colored the asterisks with Tumbled Glass Distress Stain, sprayed them (and the coaster panels) with Pearl Perfect Pearls Mist, and added a starburst sequin and dot of Crystal Stickles to the centers.  

·         I also discovered that linking the asterisks from the center extensions made them spin and flip when hanging, so I moved the jump rings so that more of the asterisk was below the baker’s twine. However, I only had two chipboard asterisks and now had an extra hole punch in them.  No worries, I just punched holes in all of the extensions and made it part of the design…gotta roll with it, right?! 

Challenges:

Tuesday, December 20, 2011

Merry & Bright

Do you have a ton of Christmas cards to make and are short on time?  Then check out today’s simple, but elegant card design.  I just had a few more cards to make and needed something quick and easy to make multiples. 

The Details:
·         Emboss the front of a folded card of Papertrey Ink Spring Moss cardstock using Tim Holtz’s “Holiday Print” texture fade and lightly apply Crushed Olive Distress Ink with a foam blending tool.  Tip:  Brush the ink on in only one direction to bring out the best dimension.  If using darker ink, apply from the bottom up, if using light ink, apply from the top down.
·         Apply strip of JoAnn glitter ribbon.
·         Stamp “Merry & Bright” sentiment on a scrap of contrasting green pattern paper using StazOn “Jet Black”.  (It’s important to use a waterproof ink in this step).
·         Punch out sentiment with scallop circle punch and ink edges with Crushed Olive DI.  Adhere to card face with foam tape and cover with a layer of Glossy Accents.

·         Apply Glossy Accents to leaves and berries of a holly sprig and cover in crystal glitter.  Once dry, apply to card with Glossy Accents.

I told you it was simple!  Now go make those cards…you still have time to make a bunch and get them there before Christmas!

Don't forget to enter the
Santa's Naughty Helper Challenge!
Click HERE for all the details.

Supplies:
Cardstock: Papertrey Ink ‘Spring Moss’
Stamps: Stampin’ Up!
Inks: StazOn ‘Jet Black’; Distress Ink ‘Crushed Olive’
Embellishments: JoAnn ribbon; holly sprig, Glossy Accents; Martha Stewart glitter ‘Crystal Fine’

Tools: Fiskars scallop circle punch; Tim Holtz texture fade ‘Holiday Print’; Sizzix Texture Boutique; foam ink blending tool; 3M foam tape

Sunday, December 18, 2011

Christmas Cuties

I’ve got two more cards for you today using Crafty Secrets ”Merry Christmas” Creative Scraps and papers from my scrap stash.  I’m calling these two “Christmas Cuties” because the vintage images are just so stinkin’ cute.  They both use the same paper and basic layout.

First up is a little birdie singing Christmas carols:


  • I used an old Stampin’ Up! set for the holly leaves, then used a trio of mismatched red buttons for the berries.  A thin layer of Rock Candy Distress Stickles smeared on with my finger gives them a frosty appearance.


Next up, is our frosty little snowman friend.  He looks so happy to not be melting…he must live around here!  Again, using the same papers and basic layout as the first card.


  • The edges of the snowman image were inked with Broken China Distress Ink and a variety of Stickles highlight his body, nose, and holly trim.

Don't forget to enter the
Santa's Naughty Helper Challenge!
Click HERE for all the details.


Supplies:
Cardstock: Papertrey Ink ‘Spring Rain’; Stampin’ Up! ‘Naturals Ivory’. ‘Mellow Moss’
Pattern Paper: scraps
Images: Crafty Secrets ‘Merry Christmas Double Sided Creative Scraps’
Stamps: Stampin’ Up!
Inks: Versamark; StazOn ‘Jet Black’; SU! ‘Not Quite Navy’, ‘Garden Green’; Distress Ink ‘Broken China’, ‘Old Paper’, ‘Crushed Olive’
Embellishments: Distress Stickles ‘Old Paper’, ‘Rock Candy’; Stickles ‘Xmas Red’, ‘Lime Green’; buttons; PTI rustic button twine; PTI baker’s twine

Tools: paper crimper, 3M foam tape; foam ink blending tool; Fiskars punch scallop circle, corner rounder; glue dots; Stamp-a-ma-jig.

Friday, December 16, 2011

Tutorial: Alcohol Ink Ornaments

The Glittered Santa Ornaments inspired me to play around with some round clear glass bulbs that I’ve had in the stash for much too long.  I started out trying to replicate mercury glass and ended up with some really special, colorful, beautiful, glittery ornaments!  Truly, these were one big experiment, but once I got the technique down, they are super easy.

The Tutorial:
1.     Using a felt ink blending tool, pounce a blend of Silver Mixative, Mushroom, and Blending Solution Alcohol Inks onto a clean, clear glass bulb, covering the bulb completely.  The ratio is approximately 5 silver: 2 mushroom: 3 blending solution.
 
TIP:  Recognize this handy-dandy ornament stand?  
It's the little gizmo that keeps your pizza from sticking to the lid of the box!

2.     You can apply the colored alcohol inks either from the bottom or the top.  The tutorial photos show it applied from the bottom, but after experimenting, I actually prefer applying them from the top.  Remove the metal hanger cap to apply from the top. 

Select your color scheme for your ornament (1-3 colors) and starting with the lightest color, apply 1-3 drops at a time at intervals around the bottom center or top opening.  I say 1-3 drops because you want to apply enough ink so that it will run most of the way down the ornament, sometimes maybe all the way down the ornament.


3.     Let each color dry slightly before applying the next.  With each color, alter the application intervals, have fun, and experiment! 

4.     The silver base application will sort of “peel” off and blend with each color addition, don’t worry, this is part of the charm!

5.     If desired, add more silver on top of the colors and repeat the color applications again at half as many drops / intervals.

6.   Once you are satisfied with the color application, let dry overnight.
7.     Remove metal hanger cap and add approximately 1 tablespoon Future liquid floor polish to the inside of the bulb.  (Don’t worry about measuring, this isn’t an exact science, I just want to give you an idea of how much you’ll need.)  Swish the floor polish around until the entire inside is coated.  Drain excess.
Update!  From SC Johnson Wax website:
The Future Floor Polish product - acrylic floor finish for no-wax & regular floors - was renamed under the Pledge® brand in November of 2007. It is now Pledge® Premium Floor Finish with Future® Shine. It is still the same great Future formula, just with a new name. It still provides that durable, long lasting shine. 
Thought you'd want to know this if you're looking for Future floor polish!  Apparently, I've had my bottle for quite some time!
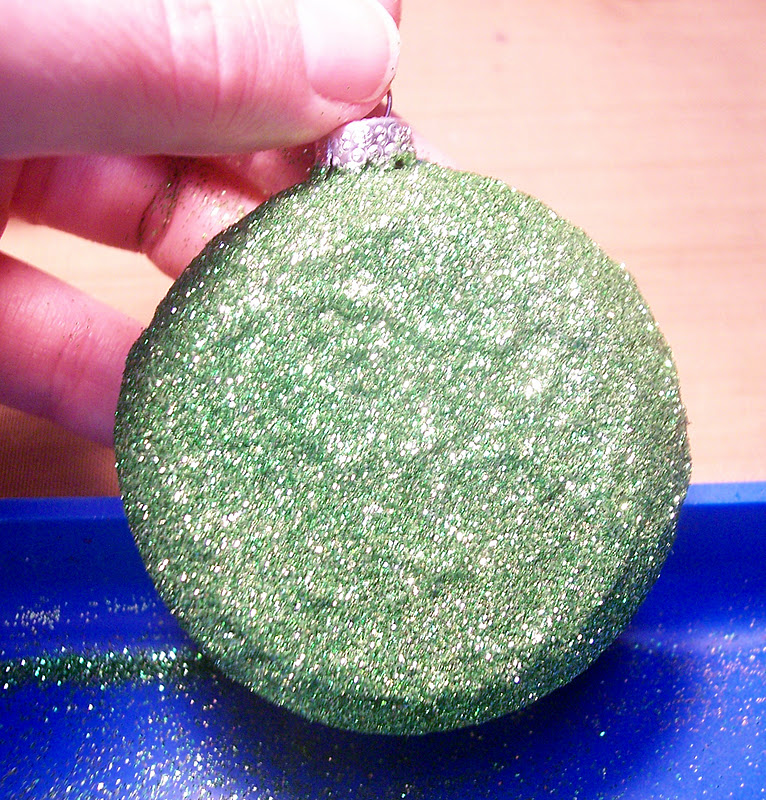
8.     Add silver glitter to the inside of the bulb.  Plug the opening with your finger and shake gently.  Keep adding glitter until the inside of the bulb has good, even coverage in glitter.  The glitter acts as a mirror and brings your AI colors to life!


Here’s a couple more ideas to inspire you to play:
·         Use painters’ tape to mask off certain areas and create patterns:

·         Sprinkle glitter on the outside of the bulb too.  Just add it while the AI is still wet and the glitter will pick up some of the AI color and stick really well.

Here are three of my finished ornaments.  The colors on the left ornament were applied from the bottom, the colors on middle and right ornaments were applied from the top.

This one’s my FAVORITE!!
The color scheme on this one is Red Pepper, Oregano, and Aqua.


It will be hard to give away, but I will, because I know it’s going to a good home.  J

It’s so hard to photograph glass and glitter well!  These are ten times prettier in real life!
I had a blast playing with color schemes and altering how I applied the color layers.  In fact, the only thing that stopped me was that I ran out of bulbs!  I think I’ll be hitting the after Christmas sales to stock up on some more for next year.

Like I said, these go really quick and are super fun to make (addicting, actually).  So if you still have some co-workers, teachers, or other folks on your shopping list, you can whip up a bunch of these beauties with just a pinch of time and moo-lah.


Don't forget to enter the  
Santa's Naughty Helper Challenge!  
It's easy and there's a PRIZE!
Click HERE for all the details.

Wednesday, December 14, 2011

Love & Laughter

Sharing another card today using Crafty Secrets ”Merry Christmas” Creative Scraps and papers from my scrap pile. Look at these little cherub faces rosy from the cold!


I used the Tim Holtz Snowflake Border texture fade on a strip of cardstock that matches the card base, then cut it out with deckle scissors. A few swipes of Broken China Distress Ink using a foam ink blender and those pretty snowflakes just jump right out. I also rubbed some Rock Candy Distress Stickles (a new favorite) onto just the raised areas using my finger and finished the snowflakes off with a dot of Old Paper Distress Stickles in each center.

Don't forget to enter the
Santa's Naughty Helper Challenge!
Click HERE for all the details.


Supplies:
Cardstock: Papertrey Ink ‘Aqua Mist’
Pattern Paper: scraps
Image: Crafty Secrets ‘Merry Christmas Double Sided Creative Scraps’‘
Stamps: Stampin’ Up!
Inks: Archival Ink ‘Coffee’; Distress Ink ‘Broken China’
Embellishments: K&Co Studio 112 tag; sticker; PTI rustic button twine; button; Distress Stickles ‘Old Paper’, ‘Rock Candy’

Tools: 3M foam tape; Fiskars deckle scissors; Tim Holtz texture fade ‘Snowflake Border’; foam ink blending tool; glue dot


Monday, December 12, 2011

Glittered Santa Ornaments

Every year, I make ornaments for my niece and nephews as part of their Christmas gift.   I usually paint porcelain ornaments, but this year I really wanted to create papercrafted ones.  About a month ago, I found these really unique clear glass bulbs.  Their flat front and back are perfect for papercrafting!

The Details:
·         Starting with this fantastic Santa image from The Graphics Fairy, I printed the quantity needed onto plain white copy paper and fussy cut.  Tip:  since I’m going to use glue on the face of the image, I gave the Santas a coat of Krylon Workable Fixatif to prevent the ink from bleeding.
·         I inked the edges of the Santa image with Old Paper Distress Ink and glued them to 2” circles of patterned paper.  I used Glossy Accents as the adhesive in this step because I knew that it would not cause the Santa image to wrinkle.
·         I added an even coat of glue to the FACE of the Santa circle.  Glossy Accents or Alene’s Tacky Glue both work equally well here, the key is just to make sure there is good coverage.  Pressing the Santa circle firmly from the center out works well to ensure good adhesion to the glass ornament.
·         Using painters’ tape to mask off the back half of the ornament made the next step a breeze! 


·         After the tape was in place, I pounced on a THICK coat of Alene’s Tacky Glue and then covered it in glitter, shaking off the excess and reapplying as needed to get full coverage. 


 ·         Remove the painters’ tape while the glue is still wet.


·         Once the glittered side was completely dry (overnight), I added rick rack along the glitter line.

·         First pouncing on some Old Paper DI, I then hand wrote “Naughty” and “Nice” on two white cardstock tags, joined them on a jump ring and then bound them to the top of the ornament with red and white baker’s twine that I then tied into a bow.

·         To keep as much glitter in place as possible, I sprayed on 2-3 coats of Krylon Crystal Clear to the back side.

These flat glass ornaments have endless possibilities!  I really wish I had purchased more, but I’m always hesitant to add too much to the stash without really knowing what I’m going to do with something.  I’m sure you all know how that goes!  They are manufactured by http://www.sierrapacificcrafts.org/, they have a store locator if you'd like to find them near you.

For another project using these great ornaments, check out The Creative Pointe, Cindy has some really neat ideas for these little beauties, too.

Also, don't forget about the  
Santa's Naughty Helper Challenge!  
Click HERE for all the details.


Linking back to Brag Monday at The Graphics Fairy!

Sunday, December 11, 2011

Holiday Hospitality

Before we get into today's card, I want to invite you all to join me in the 
Santa's Naughty Helper Challenge!  
Click HERE for all the details.

This week’s theme over at Card A Day Blog is “Christmas Thank You Cards” and as today’s featured designer, I pulled out some “oldies, but goodies” to create my card.

We always want to thank our hosts for inviting us over for a holiday party…literally opening their door to welcome us into their home. I’ve had this pediment door stamp for a loooong time, but it’s a classic and was perfect for my idea of the open door.

The Details:
  • The card itself does not open; it’s more a postcard format with a bonus! The base is cardstock layered with My Mind’s Eye Lost & Found “Christmas” patterned paper. The edges of the cardstock are inked with Old Olive, Forest Moss, and just a touch of Barn Door Distress Inks. The patterned paper also has just a touch of these inks added. 
  • A strip of coordinating patterned paper cut with decorative scissors and punched with tiny holes forms a lacy strip. On top of that, some gorgeous embroidered ribbon adds elegance and is the basis for tying the colors of the card together. 

  • The door was stamped on cream cardstock in StazOn “Jet Black”. It’s important to use a waterproof ink here…either StazOn or Archival. Pumice Stone and Brushed Corduroy Distress Stains were randomly brushed on the image. Do not completely color in, just touches of color here and there. 
  • Next the door was colored with Barn Door and Crushed Olive (wreath) Distress Ink and a water pen. Let dry or use a heat tool to dry. 
  • Using a craft knife, the door was cut around three sides so that it would “open”. The “inside” of the door was completely colored using Aged Mahogany Distress Stain. The pediment door was fussy cut from the cream cardstock. 
  • Using my laser printer, I printed “Thank You for Your Hospitality” on red cardstock and layered it behind the pediment door image so that when you open the door you see the greeting. 

  • After adhering the door assembly to the card face with foam tape, I got out the Stickles and went to town! The wreath features Lime Green, Xmas Red, and Peeled Paint Distress.   A brass brad "door knob" adds a nice touch, don't you think?
  •  I wanted the appearance of icicles hanging from the pediment roof, so I swiped a little Picket Fence Distress Stain and added a thick application of Old Paper Distress Stickles to the roof line. While that was still wet, I added dots of Icicle Stickles and then used a pin to drag them down like real icicles. 


  • As the finishing touch, I used Alcohol Inks to tone down the bright colors on a sprig of holly and antique up an enamel brad and adhered both, along with a organza ribbon, to the face of the card.

Just one more thing I want to share with you today...have you heard of Blitsy? 
It's a brand new site that offers deals on a variety of crafting supplies each Monday, Wednesday, and Friday.  I've already scored some pretty great deals...like the Tim Holtz Limited Edition Winter Distress Ink collection for only $9.95 and Stickles for only $1.49!! Visit HERE to get all the details.


Supplies:
Cardstock: Papertrey Ink ‘Spring Moss’; Stampin’ Up! ‘Naturals Ivory’
Pattern Paper: My Mind’s Eye Lost & Found ‘Christmas’
Stamps: PSX ‘Colonial Christmas’
Inks: Distress Ink ‘Crushed Olive’, ‘Old Paper’, Barn Door’, ‘Forest Moss’; Distress Stain ‘Pumice Stone’, ‘Brushed Corduroy’, ‘Aged Mahogany’; StazOn ‘Jet Black’; Alcohol Ink ‘Latte’, ‘Ginger’
Embellishments: Stickles ‘Lime Green’, ‘Xmas Red’, ‘Crystal’; Distress Stickles ‘ Old Paper’, ‘Peeled Paint’; holly sprig; ribbon; SU! brad; The Girls’ Paperie brad ‘On Holiday’

Tools: Scotch precision cutter; water pen; foam and felt ink blending tools; Glossy Accents; decorative scissors; hole punchhttp://blitsy.com/rewardsref/index/refer/id/8467/